This is the fourth in a series of articles about remote presentations. Check out the previous articles on audience engagement, single screen wizardry and using a hot screen too!
“How do I present Teams inside of a Teams meeting?”
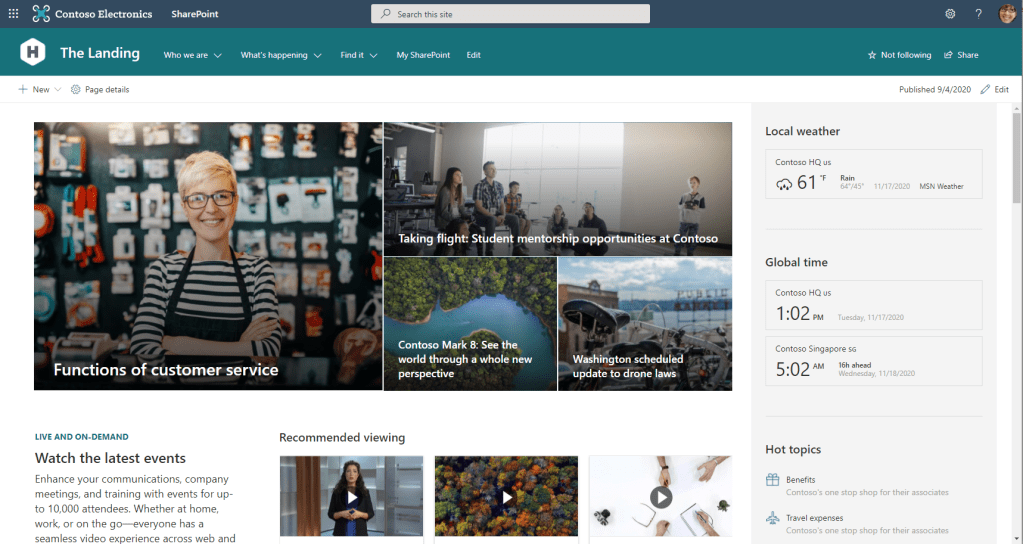
Being a product manager for Microsoft 365 many of my presentations involve demonstrating one or more of our services. In these sessions I don’t really want to show my everyday Teams environment or my working documents as they may contain confidential information or would just be distracting from the original topic of the presentation. Luckily we have great systems where I can create an independent demo tenant filled with users and documents – even interactions or the world-famous imaginary example of the Contoso corporation and I can use this to show a clean demonstration of the services.
This is all nice and well as long as all I have to do is rock up with my laptop, plug in the projector, connect to the network and show my demos. In our current hybrid environment however I need to show this through a Microsoft Teams meeting. One that I join with my corporate identity as that’s how I was invited by my colleagues or the customer or partner.
There are a few issues with this:
- I am already in a meeting so how can I demonstrate things like joining and leaving meetings?
- How do I not show any of my daily working environment so I can protect confidentiality?
- What if I want to do something in the demonstration that will use a lot of the computer’s resources (mainly processor or memory)? How do I prevent this from ruining the quality of my call with the audience?
If it’s about a Microsoft Teams demo then I can almost get away with doing a demo in the browser because you can access Teams from a browser window by just going to https://teams.microsoft.com and you get almost the same experience as you would in the Teams client (including even calling, video and screen sharing). There are however a few subtle differences and it also doesn’t look like the real thing.
Therefore the solution is to combine two devices and use the second machine as the one to run the demo with the demo identity while being connected to the meeting on the primary device. You can then use the remote desktop app to display the screen of the 2nd PC on the first one where you are joined to the meeting and share the remote desktop to display the demo.
Let me show you…
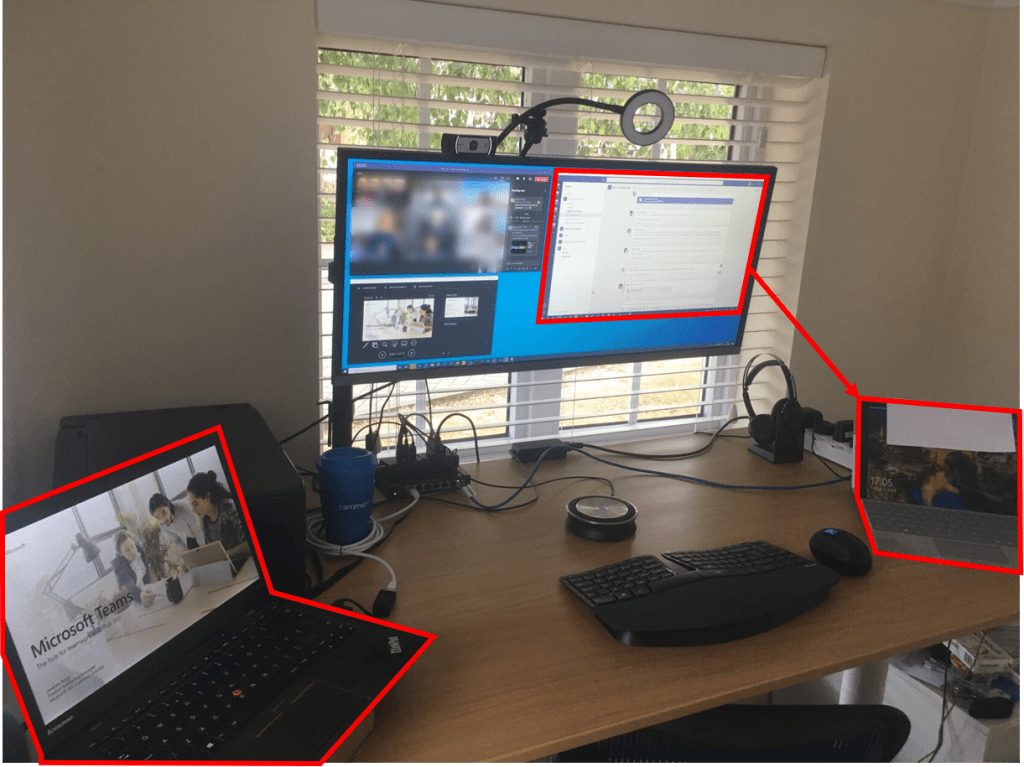
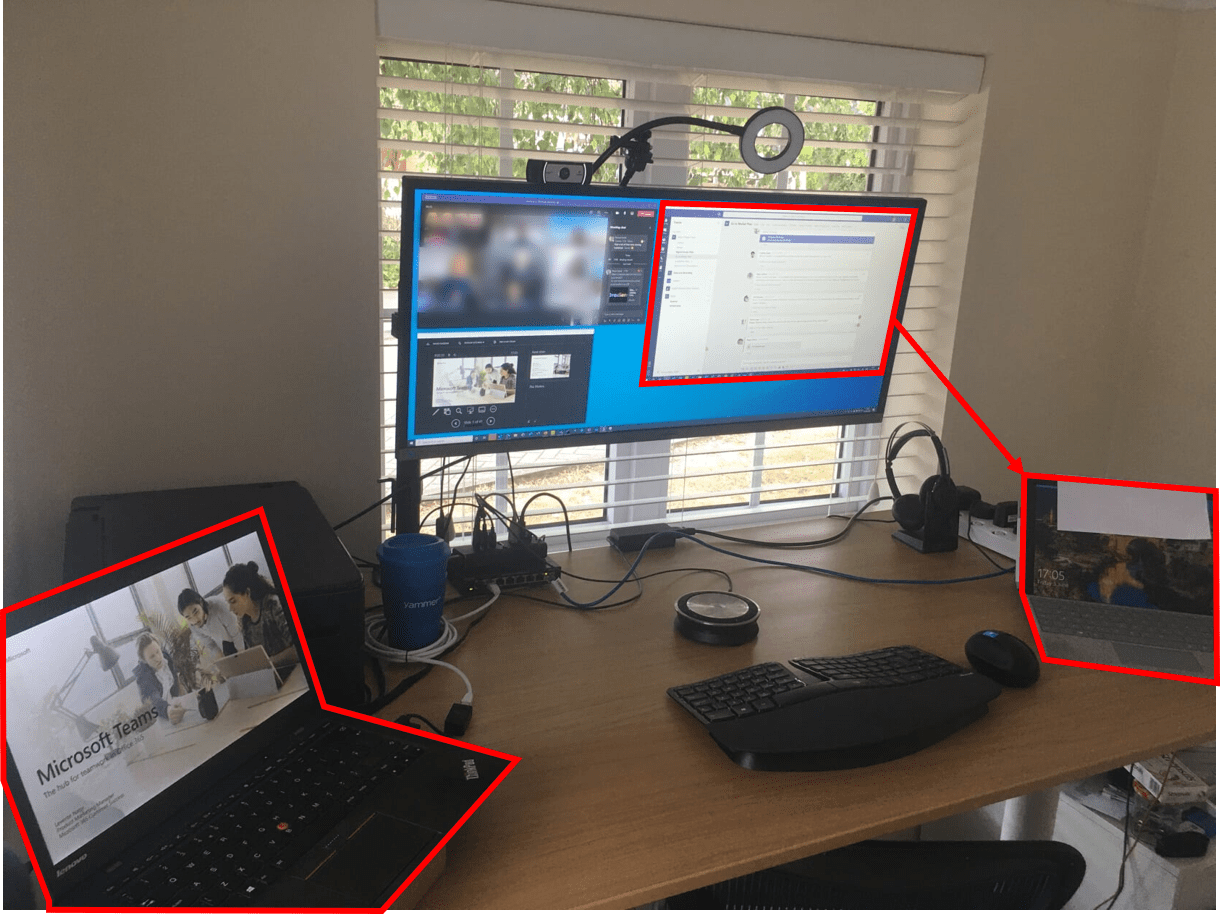
On the photo you can see my primary PC on the left – this is the one that has the external monitor attached to it too. On the right you can see my Surface Pro that is locked because I have used Remote Desktop to log into it from the other PC. This is the window you can see on the right hand side of the monitor – it is the view from the demo machine displayed on the screen of the primary machine. From here I can then share it in the Teams meeting as a window which will show its desktop into the meeting. This means that on the demo PC I don’t have to have any special credentials being used – I can easily use my demo tenant and I just need to connect to it via the local network to show its screen.
There are a few things to watch out for when setting up this combination:
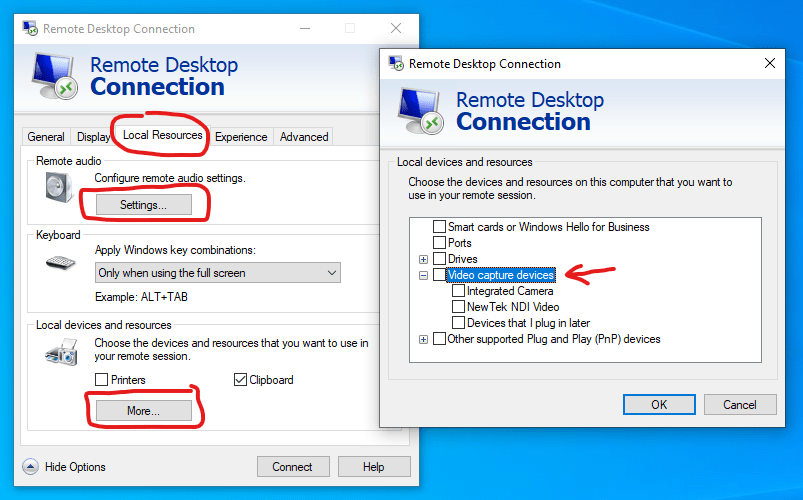
- First, you need to enable remote connections for the demo device. You can do this under Settings/System/Remote Desktop. On the primary device you will need to use the Remote Desktop Connection app and connect to the demo PC.
- You want to share your window with the right resolution. Remote desktop will default to a full-screen view but that will prevent you from working with the window on the primary PC and also may be too big. I recommend setting the resolution of the remote connection to 1920×1080 so you have enough screen real-estate for the demo while not overwhelming the audience with a too high resolution.
- If you are to demo meeting and calling features you want to make sure that the remote connection is set up to use the right audio and video devices. You can set these in the remote desktop client before you connect:
- Depending on your home network setup you may want to use a desktop switch to make sure that there is a good connection between the two devices. Using wired networking is a good idea for meeting quality anyways – you can free yourself from any potential issues with WiFi reception. If you don’t have a switch it can be an option to wire both machines into your router too.
Local logon prevention device: you might ask why there is a piece of paper on top of my Surface Pro in the photo? The reason for that is Windows Hello – which is an amazing feature that lets me log in with just looking at my device. It recognises my face and unlocks the PC. However, when I’m logged into this PC with remote desktop and I’m in the middle of a demonstration I don’t want this to happen and break my remote connection. I could also turn Windows Hello off but a piece of low-tech paper is easier for a temporary solution as I quite like using Hello when I’m not in a demo.
In the spirit of my second article you might ask: what if you don’t have a second device? In all fairness, your other device doesn’t have to be next to you. If you have access to a virtual desktop, you can use that for these combined demonstrations and that opens up a wealth of other options too. In an upcoming article I will share how I used Windows Virtual Desktop in Azure to present to my colleagues while walking outside in the sunshine away from all of my PCs.
This is how I use Microsoft Teams to demonstrate Microsoft Teams without showing my everyday working environment. What is an “impossible” requirement for your presentations that you haven’t figured out yet? Share in the comments!

One thought on “Presenting Teams in a Teams Meeting – Presenting Remotely #4”