“Ouch! I shouldn’t have shown that window… I wonder if anyone glanced my notes that I’ve been taking? Is this being recorded?”
This is the third article in a series that I am sharing to help you improve your remote presentations and make them more elegant, engaging and efficient. Check out the first two articles about staying engaged and single screen options too!
When doing a remote presentation it may be easy to get tangled across all of your screens and the various windows that you can choose to share inside the meeting. This can lead to confusion (“Which window do I have shared now?”), delays (“I just need to share this other window.”) or comedy, like when I thought I was doing a demo to my audience while they were still very politely looking at my presentation slides because I forgot to change which window I was sharing.
One of the ways to get around this which also reduces complexity and stress is to designate one of your screens as the “hot screen” that you share inside a meeting. You then keep it shared and play with the various windows dragging them inside and out to make them visible or disappear in the meeting. This way you can always be sure that whatever is on that screen is visible in the meeting and whatever is not on that screen is not visible.

How to set this up: in essence this tip is just about being mindful of which is your shared screen. There are however a few considerations that are worth keeping in mind:
- Resolution: while screens come in all sizes, it is worth choosing a good resolution to play with on your shared screen. If you share a screen with too high resolution, then your audience will be looking at very small fonts and elements (and you will be wasting bandwidth or risk your image being scaled down). If your resolution is too small, then you will not be able to comfortably demo as your windows will not fit well. Although most applications scale gracefully to smaller screens, it may be cumbersome switching around various elements of the UI. I usually use my laptop’s internal screen as the hot screen – by default it would be set to 2560×1440 resolution so I need to set it to 1920×1080 before the presentation. This full HD resolution is a good compromise for available space, bandwidth and remote viewing.
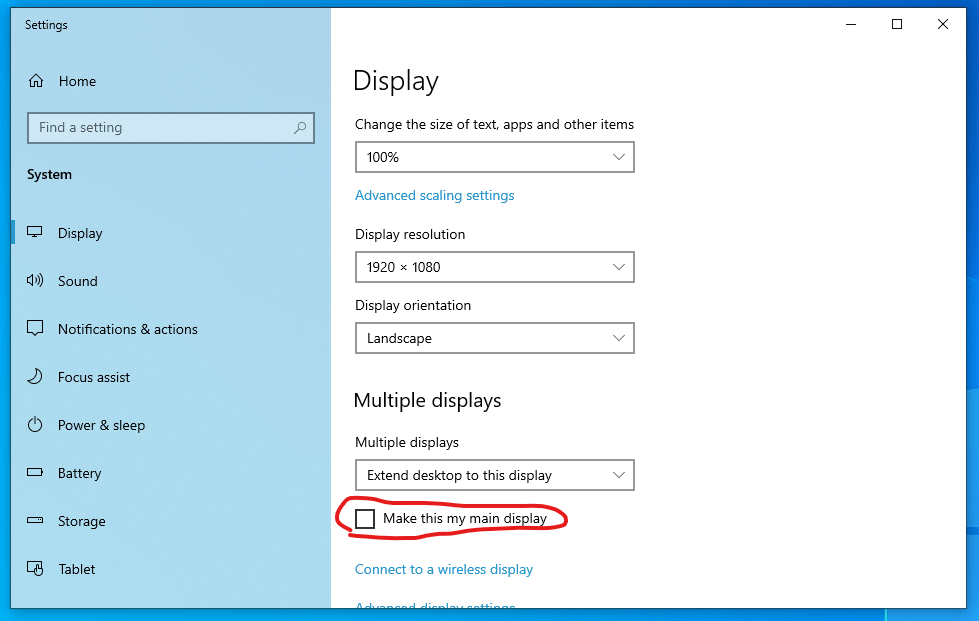
- Primary display: Windows starts most newly launched applications on the primary display (this is where the clock is also displayed on the taskbar). As you may launch applications during your presentation that you wouldn’t want to share (forgot to start OneNote for taking notes?) it is worth setting the hot screen to not be the primary one. This is a checkbox on the display settings window:
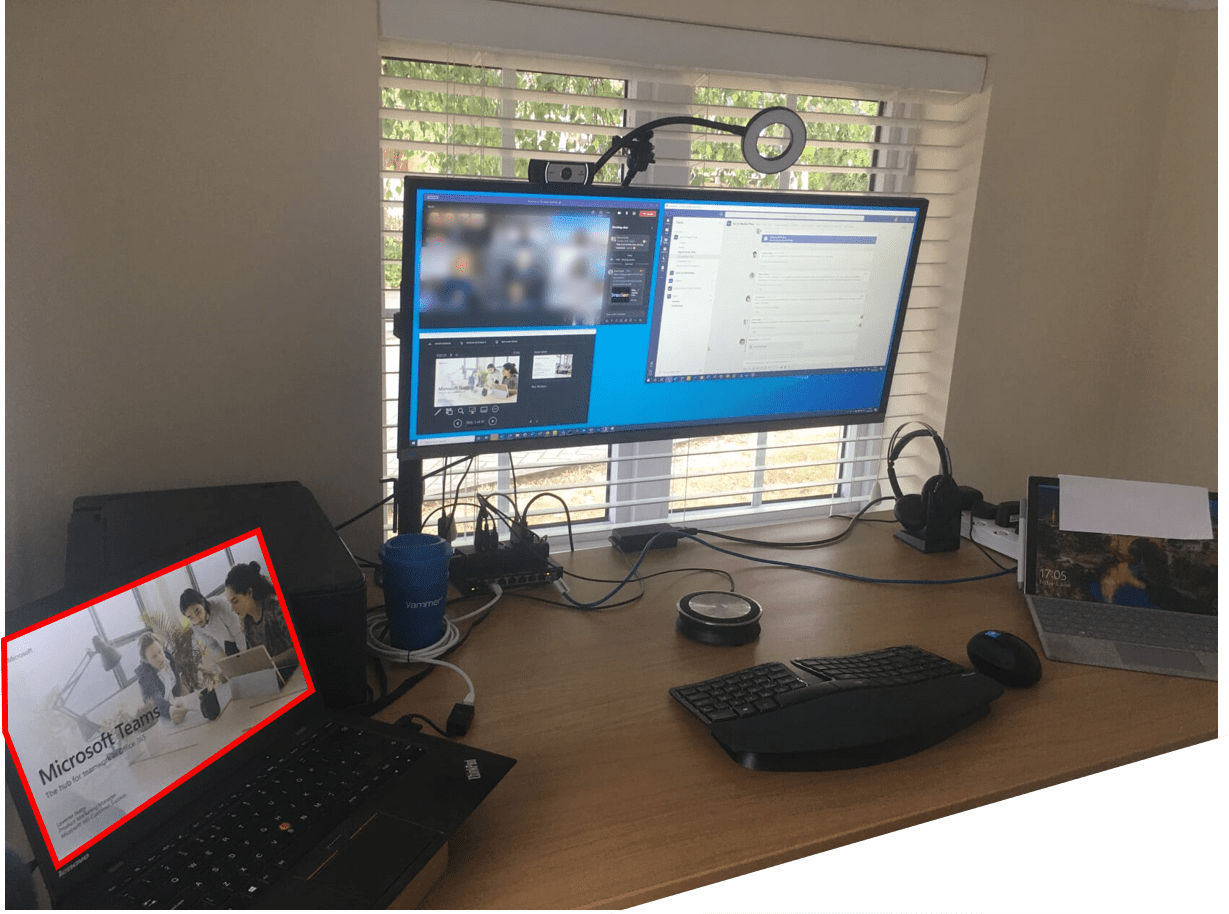
- Using touch and ink: it is great to use touch and ink for annotations and control during a presentation so this is another reason why you would want to use your laptop’s or Surface Pro’s built-in screen as the hot screen. This way you won’t need to look around your desktops to find the mouse for a quick click or a switch of slides – you can just touch the screen with your finger or pen and move on.
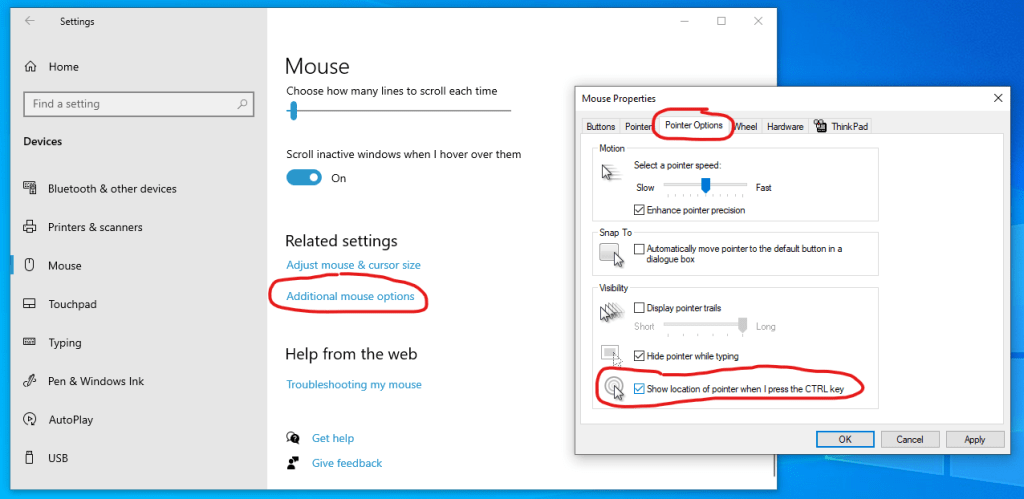
Side note: when using multiple screens I find it useful to set the CTRL key to show where my pointer is in case I have to find it. You can set this up at the mouse pointer settings here:
When using this setup, it is important to set up PowerPoint ahead of the time to use the right screen for your presentation so that the audience won’t be looking at your presenter view. Fortunately you will only need to do this once and PowerPoint will remember the setting if your setup does not change. On the SlideShow ribbon you can set which screen is to be used for the presentation and the presenter view:

When dragging applications on to the hot screen it is worth remembering how to maximise and lay them out best. I usually use snapping by dragging the window to the top of the hot screen to maximise it to that screen or dragging it on and pressing Win+Left Arrow or Right Arrow to put it side-by-side with something else I want to show at the same time.
As a final touch, don’t forget to switch cameras in the meeting if you will be looking at your demo screen for a longer time. While the audience will most likely be looking at your shared screen it is still nicer to see a frontal image of your head than looking at your profile not knowing what else you could be looking at. In my remote presentation setup I use the internal screen of my laptop as the hot screen so switching to the built-in webcam just above the screen lets me look very close to the camera which in turn gives my audience an impression that I’m making eye contact with them while using my hot screen.
Have you ever shown something in a presentation that you shouldn’t have? Dare to share it with us in the comments?

Thanks Levi! I like this hot screen idea. But what about the camera when you are using presenter view on your external monitor? Are you switching camera when using presenter view on external monitor?
LikeLike
Thanks for the comment and great to hear from you! 🙂 When I’m presenting, using the presenter view I keep my camera active that is on to of my external screen and I move the presenter view close to that point so I am almost making eye contact. If I spend a longer time demoing on the hot screen then I switch over to the built-in camera that is right above the hot screen. Does this answer your question?
LikeLike